The Ariel Atom is a great piece of kit, however with it being such a unique car and with a long waiting list, owners usually end up buying a car that isn't exactly the spec they want, and end up performing upgrades themselves after purchase.
If you're looking to track your car chances are you want to install a towing eye. Alternatively you may be wanting to add a
to your Atom, in which case you will need to install the same
.
Here we will show you how to do this. The procedure is fairly straightforward for anyone handy with a spanner.
Step 1: Remove Bonnet and Front Nosecone
First remove the bonnet by undoing the two
at the top and one below the front.
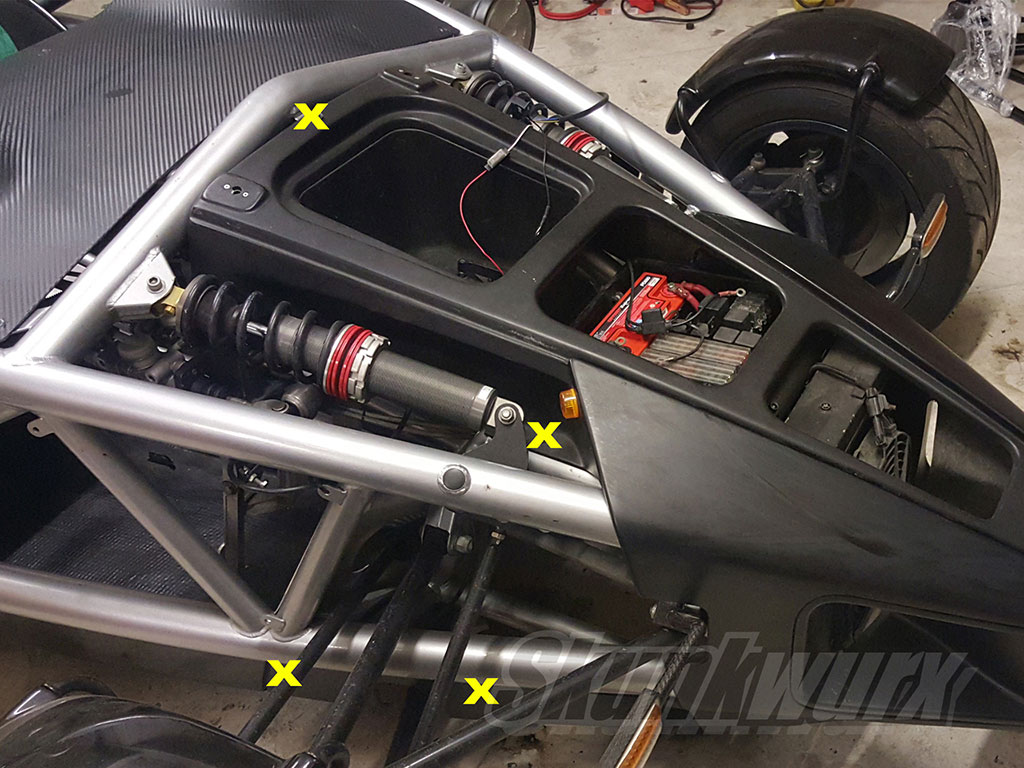
The nose cone then needs to be removed. This is done by unscrewing the 7 screws that hold it in to place. Two of the screws are fitted along the bottom on each side, one is fitted on the flat recess by the side of the shock absorber on each side, and one is fitted in the center above the bonnet storage box.
After removing the screws the nose cone needs to be "wiggled" and pulled forward to be removed. Move the cone forward only a few inches and then take a few minutes to ensure any wiring attached to the nose cone (such as the repeaters for the Atom 2) is unplugged before completely removing.
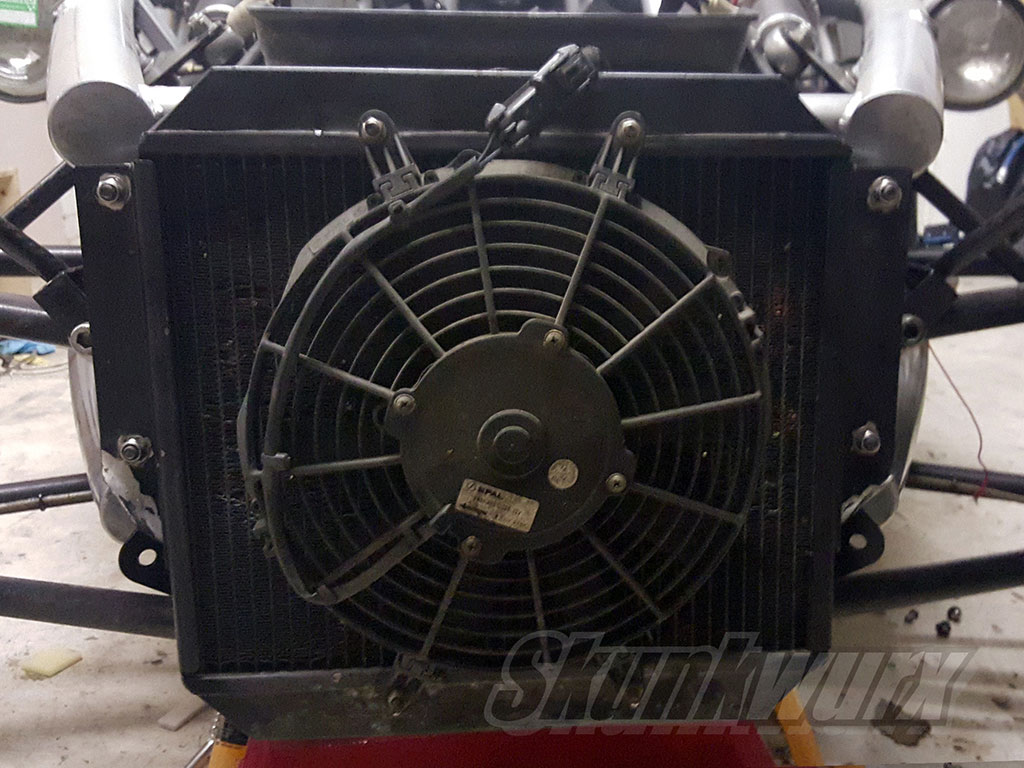
Once the nosecone has been removed you will be able to see the radiator.
Step 2: Remove the Radiator
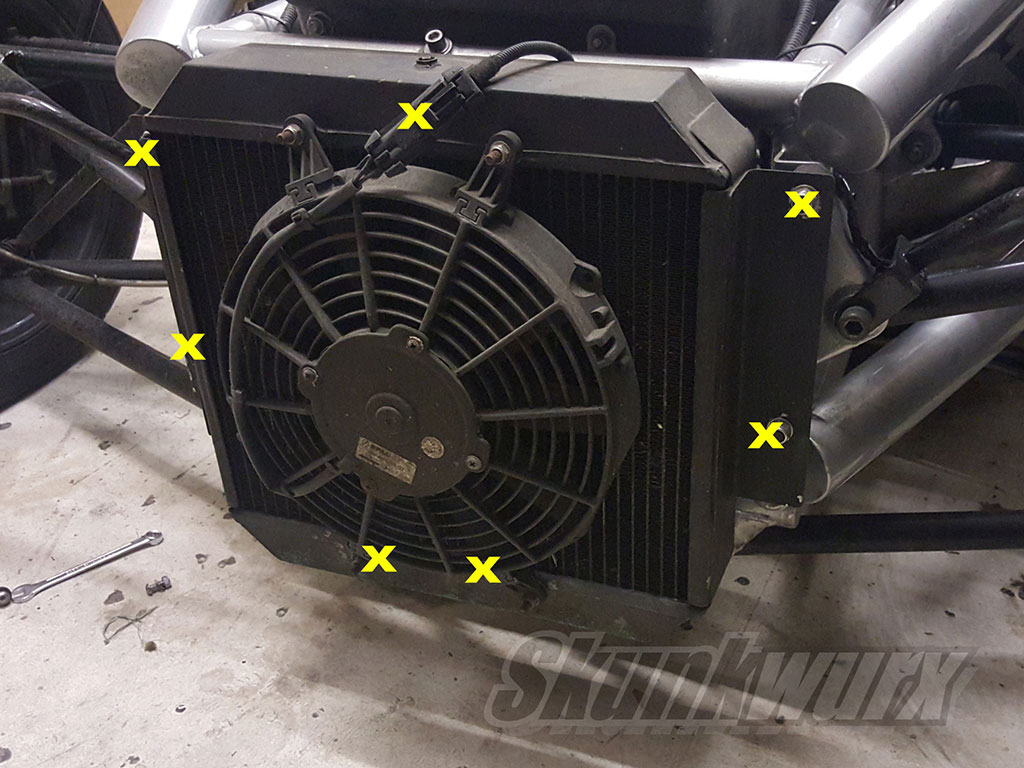
The radiator is held on with two nuts on each side and the two hoses at the bottom behind the radiator, held on with jubilee clips
At this point it is advisable to jack up the front of the car and rest it on axle stands to prevent the coolant from draining continuously from the back of the car once the radiator hoses are disconnected. Jack up the front of the car from the chassis tubes, and ensure the car is on level ground and in 1st gear, with wheel chocks placed behind the rear wheels to prevent the car rolling away. DO NOT JACK UP THE CAR FROM THE RADIATOR. Once the front of the car is raised, place a pan or a container below the radiator to catch leaking coolant. Loosen the two jubilee clips and undo the four nuts to loosen the radiator. Before removing completely unclip the electrical connector at the top that feeds power to the fan.
Step 3: Attach the Butterfly Brackets
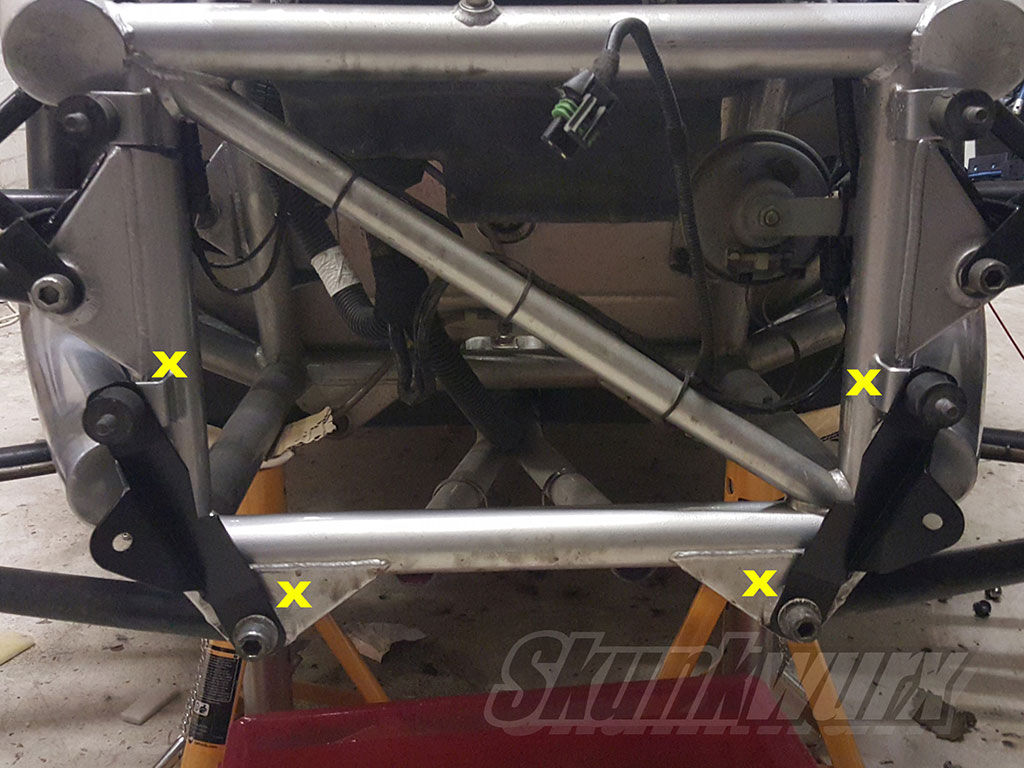
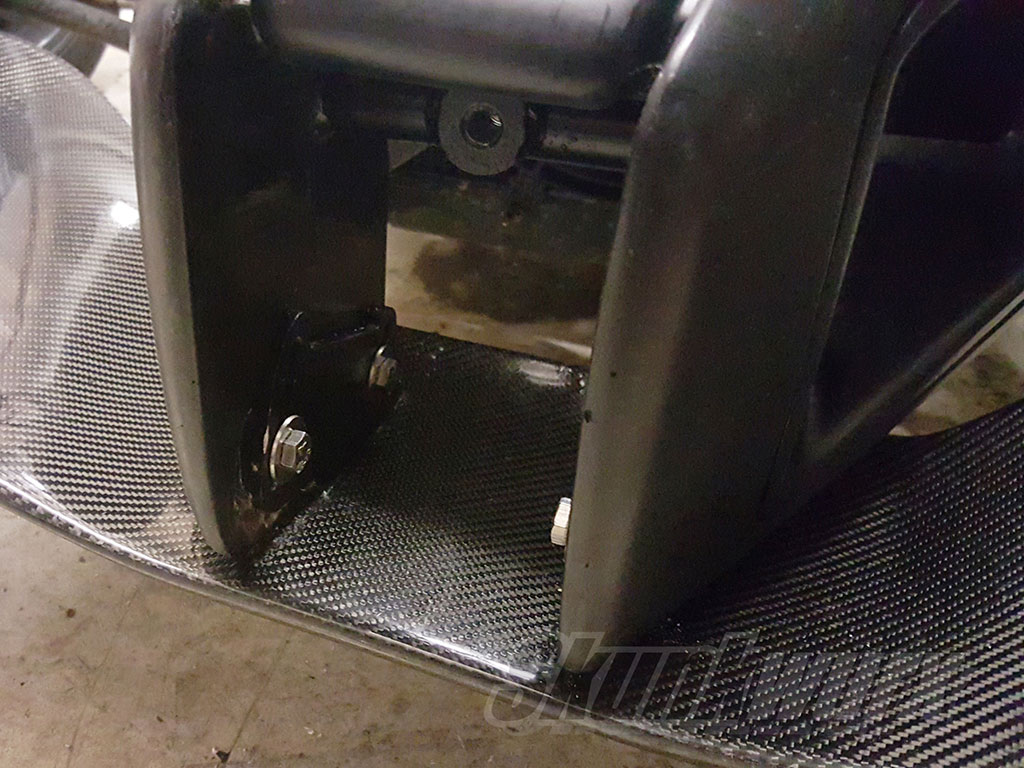
The two butterfly brackets supplied with the kit now need to be fitted to provide a mounting surface for the lower arms of the main bracket.
The two brackets are fixed to the car using existing mounts on the car and using the existing nuts as showing in the picture. Note the bracket fits BEHIND the lower radiator mounting bushes at the top points of the bracket.
Step 4: Re-Attach the Radiator
The radiator is fitted back to the car in its original position using the original fittings. Ensure the rubber bushes are mounted behind the radiator. This is also a good opportunity to inspect the bushes for excessive wear or damage and replace if necessary.
NOTE: If your car has one of the earlier radiators the flanges at the side of the radiator may be excessively long at the bottom, obstructing the fitting holes in the butterfly brackets. In this instance the flanges can either be trimmed with a grinder/Dremel-type tool or simply be bent up as shown in the pictures. By gripping the corners with a pair of pliers and pulling upwards towards the radiator the flanges can be bent easily.
Don't forget to re-attach the electrical connector for the power to the fan.

Step 5: Attach the Front Towing Eye/Wing Bracket
The main bracket can now be fitted on to the car, and is held in place by fixing to the two holes in the two butterfly brackets installed in Step 3 above, and the existing mounting hole on the chassis behind the radiator, half way across the top.
Remove the existing nut from the chassis at the top, behind the radiator, and place the main bracket in to position. Replace the nut with the supplied longer nut and tighten loosely. Do not fully tighten at this point. Now fix the lower arms of the mounting bracket in to the butterfly clips using the nuts supplied from behind the butterfly brackets. The bracket is held under tension when fixed so the holes will not line up immediately and slight force may be needed to flex the bracket in to position. Should you struggle to line up the holes, remove the top nut. this will allow you to re-position the bracket easier for the bottom nuts, and reinsert once the bottom arms are in place. Once all three nuts are in position, tighten each nut slightly one at a time. Do not tighten just one nut fully whilst the others are still loose as this will cause uneven tension distribution. Repeat tightening of each nut until all of them are fully tightened.
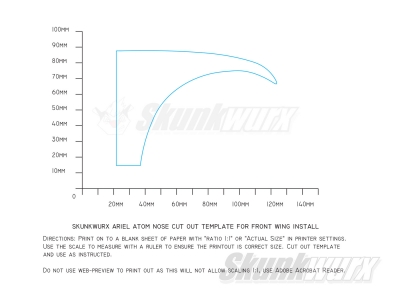
At this point if you wish to attach a
to the bracket then follow our How To: Install a Front Wing on the Ariel Atom tutorial, jump in at Step 2.
Step 6: Re-Attach the Nosecone
Place the nosecone back in position. If you installed a wing the clearance that was cut using the template will sit as shown in the picture.
Replace the seven screws removed in the first step and tighten. Replace the bonnet. The installation is now complete.
Don't forget to to re-attach any cables and connectors that may have been disconnected when the nosecone was removed.
Once you have completed the procedure you will need to top up the coolant and bleed the radiator to get rid of any trapped air in the cooling system.