

Adding a
to your Ariel Atom is a sure-fire way of increasing the attention you will get! Installing it is fairly straightforward and only requires a few tools. It is assumed that you already have a
installed, however if you don't, you can follow the instructions in our How To: Install Ariel Atom Front Wing/Towing Eye Bracket to install one.
The nuts and washers required are usually supplied with the
kit, however if your car came pre-installed with the bracket and do not have these, you only require four M8 x 20mm hex nuts and four M8 washers. We recommend using either A2 steel or marine nuts to prevent rust as these nuts will be exposed to the elements.
Step 1: Remove Bonnet and Front Nosecone
First remove the bonnet by undoing the two
at the top and one below the front.
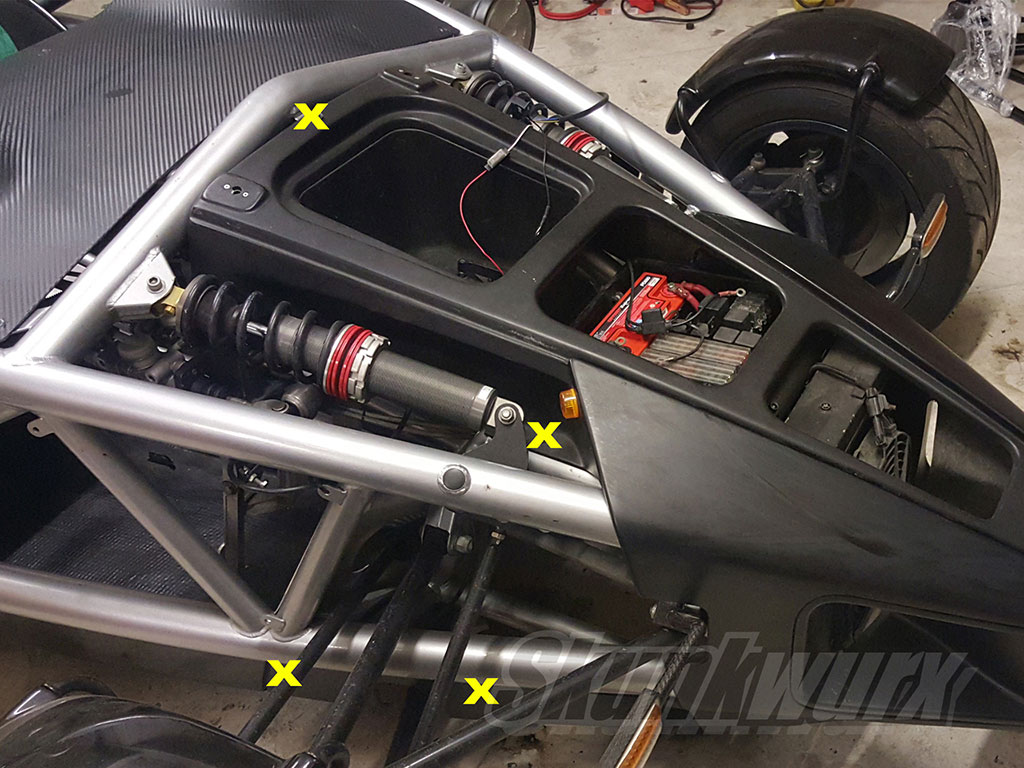
The nose cone then needs to be removed. This is done by unscrewing the 7 screws that hold it in to place. Two of the screws are fitted along the bottom on each side, one is fitted on the flat recess by the side of the shock absorber on each side, and one is fitted in the center above the bonnet storage box.
After removing the screws the nose cone needs to be "wiggled" and pulled forward to be removed. Move the cone forward only a few inches and then take a few minutes to ensure any wiring attached to the nose cone (such as the repeaters for the Atom 2) is unplugged before completely removing.
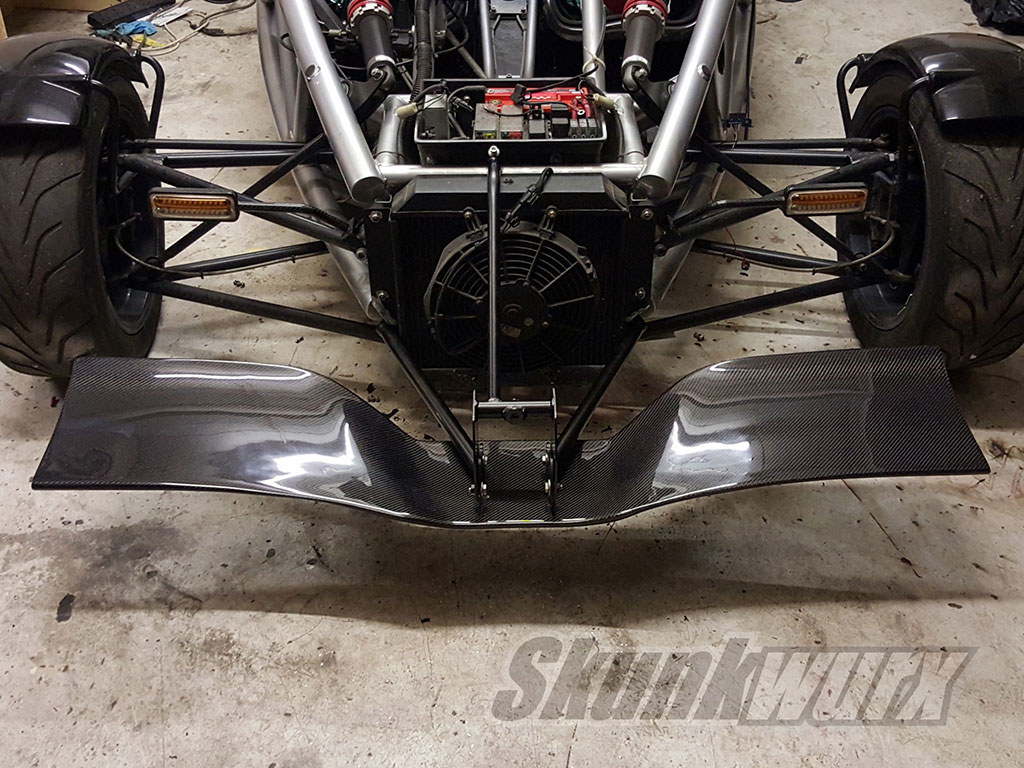
Once the nosecone has been removed you will be able to see the front towing eye/wing bracket installed on the car.
Step 2: Fix the Wing to the Bracket
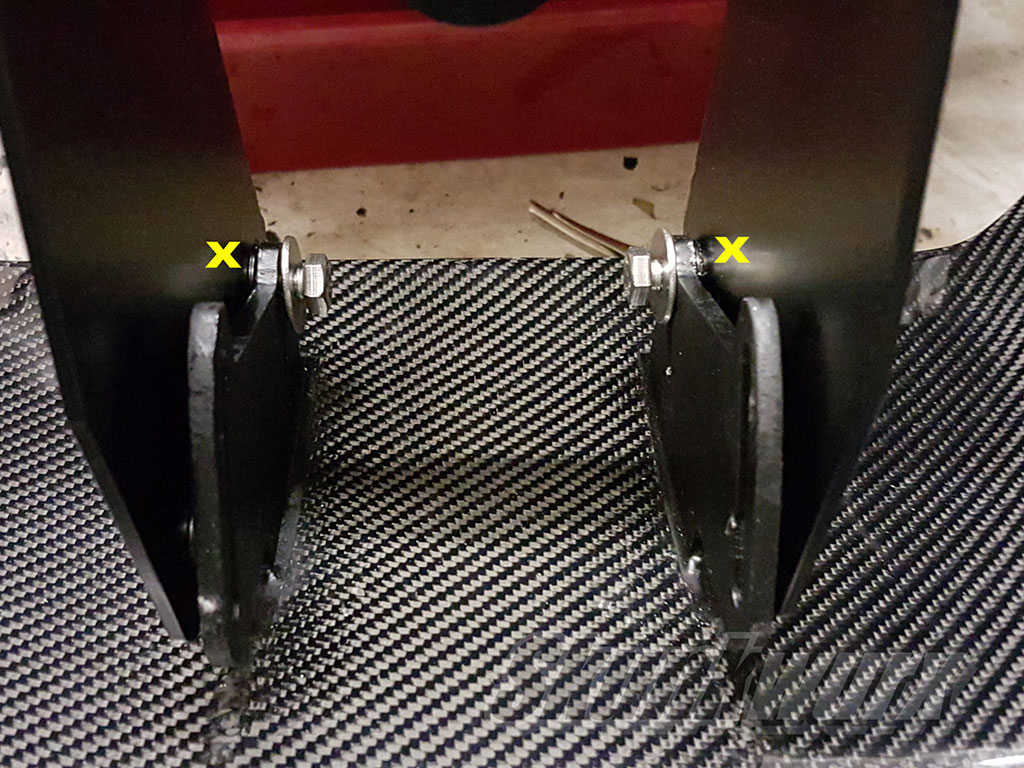
Align the fitting brackets on the such that they sit inside the fixing plates on the front towing eye/wing bracket and secure at the rear points using two of the M8 nuts at the desired position.Fasten the nuts firm enough that the wing does not slide down at the front of its own accord but do not fasten too tight such that you cannot swivel the wing.
Step 3: Make Pilot Hole Markings
IF YOUR WING COMES WITH PRE-DRILLED FIXING POSITIONS, JUMP TO STEP 5 BELOW. With the wing fixed in at the rear points, swivel the front of the wing such that it is in the desired fitting position
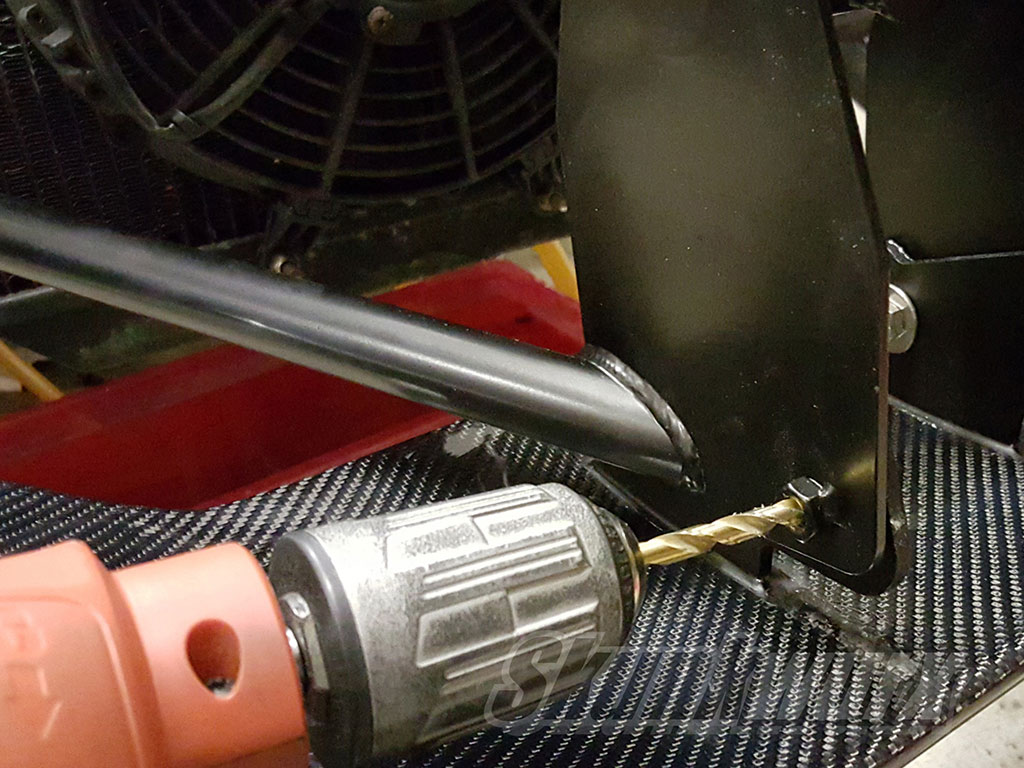
Using a 6mm HSS drill bit, feed through from the OUTSIDE of the bracket through the welded nut and operate the drill for a few seconds such that a small dent is drilled in to the bracket on the wing. Try to ensure the drill bit is centered through the nut and avoid letting the drill bit touch the walls of the nut as this will shave away the thread on the nut. Do not attempt to drill all the way through the bracket as more than likely you will damage the inside thread of the fixing nuts. Also ensure the wing does not start swiveling down due to the vibrations. If this happens then simply tighten the rear nuts further so the wing is locked in to position. Repeat the process on the other side.
If you wish to make your wing adjustable, you can mark multiple positions but keep a minimum distance of 20mm between the centers of adjacent fixing positions.
Step 4: Drill the Fixing Holes
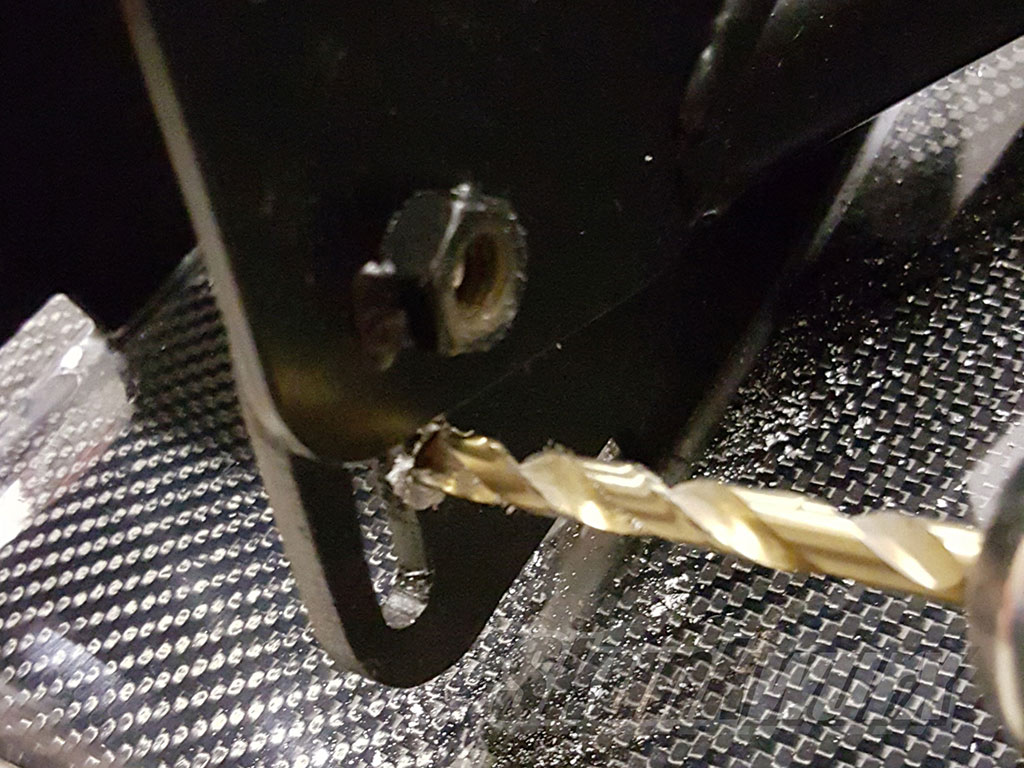
With the pilot holes marked, swivel the wing down (or remove completely for easier access) so the markings are visible.Using a 2mm drill bit, drill through the marked centers creating pilot holes. Do not try to drill through with a larger bit as the drill bit is likely to go off center and create holes in the wrong positions. Once the 2mm hole has been drilled, re-drill the same hole in increasing bit sizes all the way to 9mm. When using 8mm/9mm bits the hole is likely to expand in to the slider (which is used for some old US-style brackets only).
Repeat for the rest of the holes and re-attach the wing at the rear if you detached it to drill the holes.
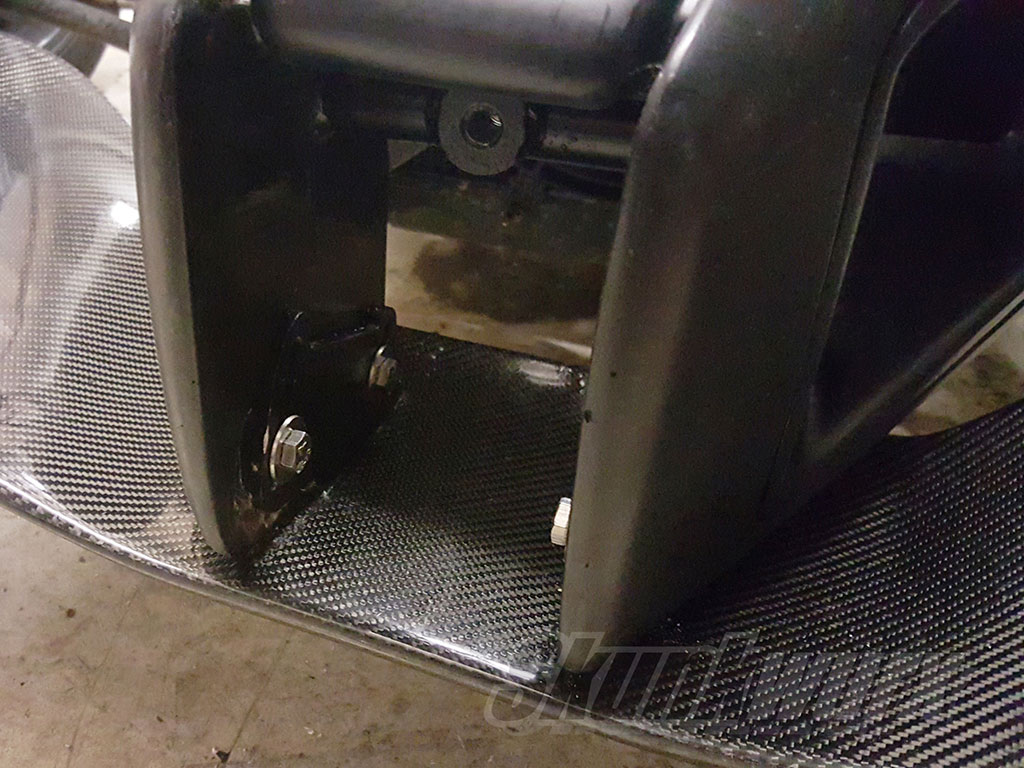
Step 5: Fix the Wing in to Position
Swivel the in to the desired position and feed the remainder two M8 nuts through the fixing holes and tighten in to the the main bracket. Ensure all four nuts are tight.
Step 6: Cut Clearance in the Nosecone
The nosecone will now not slide fully back in to position, the newly installed wing brackets will catch on the recess of the nose and as such needs to be modified.
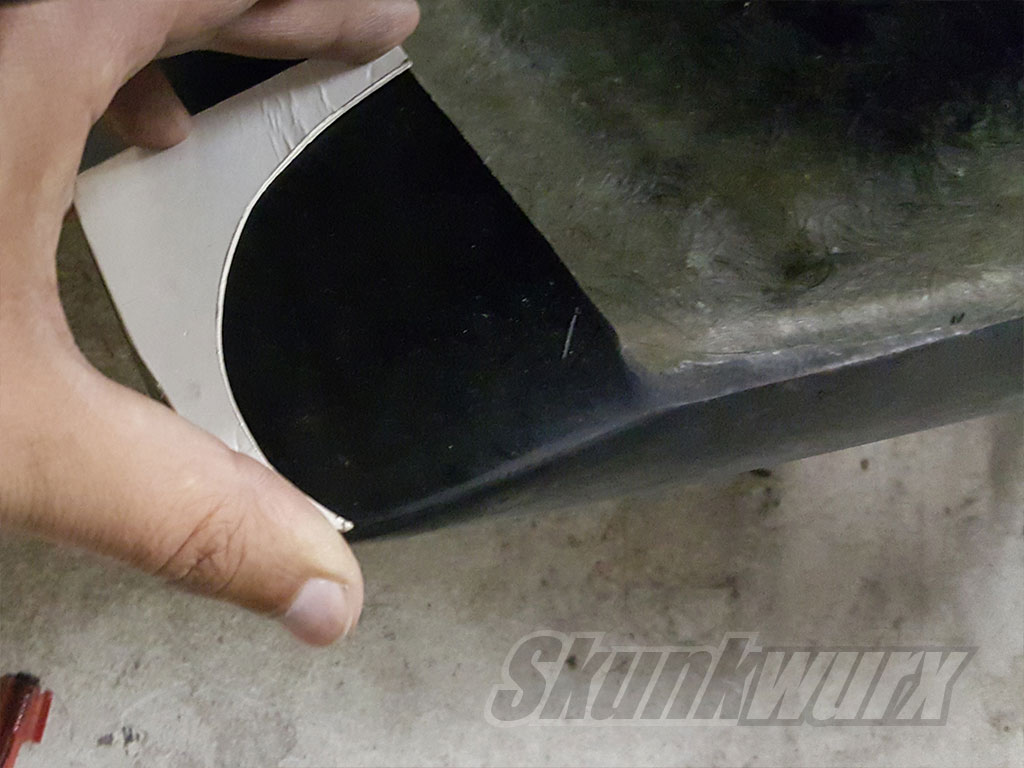
Using the cutout template (you can download a template
to print off and cut), position and mark the inside of the nose cone on both sides as shown in the picture. Mask off vulnerable areas to prevent accidental scratches or damage from splinters when cutting and proceed to cut with a Dremel-type tool or a die-grinder.
Take appropriate safety precautions as the fiberglass is likely to shed a lot of fine splinters which can cause unwanted irritation and itching on the skin and is harmful if inhaled. Perform the cut on both sides of the inner nosecone.
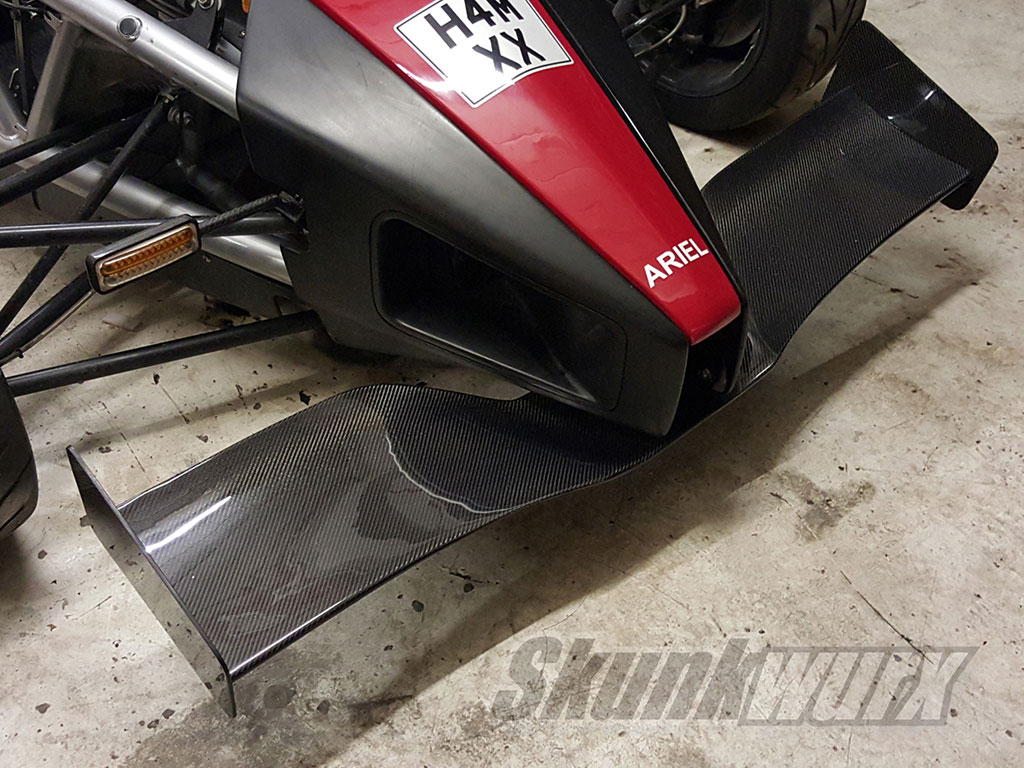
Step 7: Re-Attach the Nosecone
Place the nosecone back in position. The clearance that was cut in the nosecone using the template will sit as shown in the picture.
Replace the seven screws removed in the first step and tighten. Replace the bonnet.
Don't forget to to re-attach any cables and connectors that may have been disconnected when the nosecone was removed.
Step 8: Attach the End-plates (if applicable)
The end-plates for the can now be attached (for the versions with detachable end-plates) and you are ready to go!